Category Archives: cheese

Tartiflette (Serves: 3/4 – Preparation time: less than 1hr)

Molten cheese oozing between layers of potatoes and smoky crispy bacon pieces – do I really need to say any more?  As I write this recipe I am sorely tempted to sneak out to the shops an buy another Reblochon as I adore this recipe (my waistline less so…)

 If you like cheese, but haven’t tried Reblochon before I implore you to try this Tartiflette recipe. However be warned this little number is not for the faint-hearted.  It incredibly rich and will require you to have worked up an appetite, or to have a lazy afternoon ahead of you so that you may quietly slip into what I like to consider a ‘food coma’ (an afternoon of dozing in front of a fire).

Reblochon is an unpasteurised mountain cheese that comes from the Haute-Savoie in France – it has a soft rind that you can eat and a gooey middle.  It has quite a strong smell so if you aren’t cooking with it straight away I would keep it in a Tupperware box in the fridge.  That being said its taste is surprisingly delicate and nutty which matched with the waxy buttery potatoes and the saltiness of the lardons is absolutely scrummy.  Definitely one to try this winter – Bon Appétit!

dsc_0144-2 Continue reading

Goat’s curd and spinach tart (Serves: 4 – Preparation time: 1hr – 1.5hrs)

I work a ten minute walk away from Borough Market in London which means on a good day I am able to head over there during my lunch break. I tend to amble through the market seeing what is in season, chatting to the stall holders about their produce and what they recommend doing with it. Bliss!

On my last visit I ended up buying some goat’s curd (soft cheese) from Ellie’s Dairy with the idea of making spinach and goat’s curd tarts. The curd had a delicate flavour and unlike other goats cheese I can safely say then you couldn’t taste the goat. Instead it had subtle zesty notes that lingered on the palette. If you can’t find goat’s curd then substitute with ricotta or another soft cheese of your choosing.

One of my concerns when making the tart was whether the moisture in the spinach would cause it to have a ‘soggy’ bottom – however this was not the case. So long as you squeeze as much liquid as you can out of the spinach after wilting it you should end up with a crisp pastry.

The tart can be served hot or cold which means it is ideal if you need to prepare something in advance or are simply looking for lunchbox ideas. Enjoy!

dsc_0030-3 Continue reading

Griddled nectarine, coppa and gorgonzola salad (Serves: 1 – Preparation time: 10 minutes)

I have many fond childhood memories of summer holidays spent in Italy visiting my Aunt and Uncle. Many hours would be spent searching for the tortoises in my uncle’s vegetable patch between the most delicious al fresco lunches and suppers.  I think it was during these visits that I first encountered the delights of Italian cured meats and of course Gorgonzola.  Every day platters cheese, freshly sliced salami, Parma ham and Coppa  would be piled on a long trestle table along with bowls filled with slices of melon, tomato salads, bread and other delicious bits and bobs and we would eat to our heart’s content.

This salad recipe is a nod to those summer days in Italy.  For those of you that are less familiar with Coppa it is a type of salami made using the part of the loin of pork that is taken near the neck which is cured and marinated in red wine a garlic.  It is traditionally served raw, cut into thin slices though it can also be used as bacon in recipes.  You can find Coppa in most Italian delicatessens, however, if you aren’t able to find it then I would substitute with Serrano Ham.

This recipe is a lovely balance of flavours and textures which for me evokes the tastes of summer and is definitely one to try.  The recipe makes enough for 1 person, so multiply the ingredients as required.  Enjoy!

DSC_0837 Continue reading

Moussaka (Serves: 4 – Preparation time: 1 hour)

Aubergine is a fairly underrated vegetable which I think is a little unfair. When cooked well it is absolutely delicious and is a fairly meaty vegetable which is great if you are looking for something to bulk up a meal.

As with many things, preparation key to making this vegetable shine. For aubergine this means cutting the vegetable as required by a recipe, place on some kitchen paper or a tea towel, sprinkle over some salt, cover and leave for 10 minutes to draw the moisture out of the vegetable. If you are using the aubergine as a layer in a dish for example as it is used in the moussaka recipe below then there this one further step that I would highly recommend – lightly oil each side of the aubergine, place under a hot grill and cook for 4-5 minutes on each side which will soften the aubergine and give it a slightly smoky taste – adding to the overall flavour of the dish.

I like to think of moussaka as a healthier version of a lasagne as aubergine replaces the pasta sheets and in this recipe the crème fraiche replaces the béchamel sauce.  I would avoid using low fat crème fraiche for this recipe as it has a tendency to split and go watery.  If you can’t get crème fraiche and don’t want to make a béchamel sauce then use cream cheese instead.

I would suggest serving this recipe with a green salad as this moussaka recipe is packed full of flavour and it would be a shame to overpower it. So don’t over complicate it – a rocket or watercress salad with a little French dressing is the ideal accompaniment to this dish.   Enjoy!

 DSC_0724.JPG
Continue reading

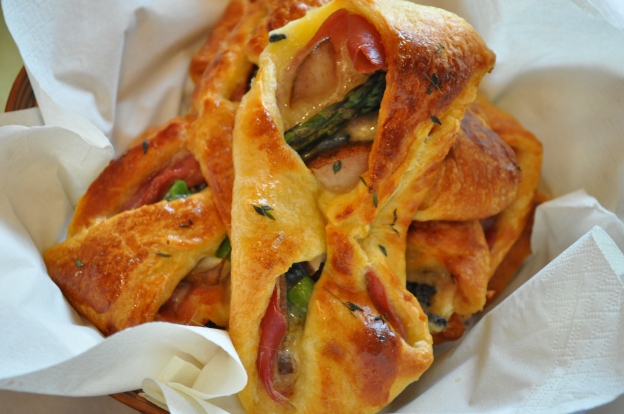
Savoury croissants (Serves: 6 – Preparation time: 20 minutes)

One of my great friends is visiting from Jordan at the moment and it is such a treat to be able to catch up with her over brunch!  Whilst Jordan has delicious food, two things that are relatively hard to get out there are blue cheese and ham.  So with that in mind that I thought it would be nice to whip up a quick brunch containing both of these things.

This recipe is really very quick and easy and can be easily adapted according to your own tastes.  There is no need to pre-cook any of the ingredients, so it is really a case of putting the filling on the croissant dough and folding them up into a little parcel before putting them into the oven to bake.

Now, if you really want to go the whole hog you can make your own croissant pastry, but in my view life is too short so I tend to stick with pre-made dough.  One word of advice in relation to making this recipe is make sure that you seal the edges of the pastry as best as you can by pinching the dough together as this will help prevent the cheese oozing out of the croissant whilst it cooks! Enjoy!

DSC_0678 Continue reading

Pâtés

Ladies and Gentlemen I am back!  Each Friday going forward I am going to endeavour to post some new recipe ideas for you.  So watch this space!

Today I have whipped up three different pâtés any one of which would make a great little starter if you have friends popping over, or as a light lunch with some salad or other nibbly bits. The first pâté was mackerel pâté which is a personal favourite of mine.  Mackerel pâté takes a matter of minutes to make and is scrummy served on fresh bread, melba toast or even that 70s throw back a vol-au-vent.

Second up is a vegetarian option, roasted red pepper and olive pâté which requires a food processor to blend the cream cheese and red pepper together.  This pâté is wonderfully light (a result of blitzing the cream cheese in the food processor) and the red pepper gives it a slightly piquant but sweet flavour.  If you are tempted to blend all the ingredients together I wish to warn you that the olives will give the pâté somewhat grainy texture.

Last but by no means least duck and orange pâté, it involves a bit more effort to make but is a good contrast to the other two pâtés.  To make this pâté perfectly smooth after putting it through the food processor you will need to pass it through a sieve.  If you do not mind having a slightly course pâté than I would suggest that you skip this part of the recipe…

Enjoy!


DSC_0431 (2).JPG Continue reading

Stilton and fig tart

photo 3I have an abundance of Stilton in my fridge leftover from my brother’s wedding and I have been trying to think up things to make with it. Tonight having seen that figs were on sale in the local supermarket I decided to make a very simple tart. It is a fantastic option for a midweek supper especially if you are having one or two friends over as it takes a matter of minutes to prepare and you can happily chat away whilst it is cooking in the oven.

Whilst I enjoyed it as a main meal with a simple salad, this would make a great starter which you could make into individual portions just by cutting the pastry up into small squares and then following the same steps. This is definitely worth giving a go. A simple and very tasty supper!

photo 4 (1)

Stilton and fig tart (serves 4)

Ingredients:

– 1 packet of pre-rolled puff pastry
– 100-150g Stilton (cut into small cubes)
– 3 figs (sliced into roughly eighths)
– 1 handful of lardons or bacon bits
– 1-2 tsp honey
– 3-4 sprigs of parsley (chopped)
– 2 tbsp milk
– Olive oil
– Seasoning

Steps:

1. Preheat the oven to 200C.

2. On a high heat fry off the lardons for a couple of minutes. Set to one side and allow to cool slightly.

3. Lay the pastry out on a piece of baking paper on a shallow baking tray, fold over roughly 1cm of the pastry all around the edges to create a lip.

4. Taking a pastry brush, brush a little of the milk all over the pastry.

5. Scatter the stilton and lardons over the pastry then place the pieces of fig evenly over it.

6. Season with pepper and drizzle over a little olive oil before placing in the oven a baking for 20-25 minutes or until the pastry is golden brown.

7. Remove from the oven, drizzle over some honey and scatter over the chopped parsley.

8. Serve warm with a salad. Enjoy.

photo 2 (2)

Chilli beef burgers

DSC_0923 (2)

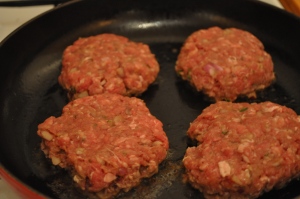
A few years ago I dropped in on Jones and her parents in Shropshire and I was treated to Papa Jones’ chilli beef burgers and they were pretty special.  Last week I thought I would see if I could recreate them, given that we had an abundance of burger buns in the freezer.

Making burgers is incredibly straight forward and can be made and cooked within 15 minutes, so a perfect option if you are looking for a simple supper.  You can ‘jazz up’ your burger by adding Stilton and tomato relish which is my preference, or you could go for a combination of, cheese slices, fresh tomato, bacon, mustard, lettuce, etc. The options are endless…

With BBQ season coming up quick and fast these burgers are a great option and can be made up well in advance and will keep in the fridge if covered in cling film for a couple of days.   This is definitely a recipe to try.  Enjoy!

DSC_0921 (2)

Chili Beef Burgers (makes 6)

Ingredients :

  • 400g minced beef
  • ½ red onion (diced)
  • 2 garlic cloves (diced)
  • 1 birds eye chilli (finely chopped)
  • 1 tbsp sweet chilli sauce
  • 1 tsp fresh thyme
  • 1 tsp mixed herbs
  • 1 egg
  • seasoning

Steps :

  1. Place all the ingredients in a bowl and mix together well (it is much better done with your hands).
  2. Shape the mixture into 6 equal sized balls.
  3. Heat a little oil in a heavy based frying pan.  Place the meat balls in the pan, using either your hand or a spatula to flatten out your burgers, till they are roughly ¾ of an inch thick.
  4. Cook your burgers for roughly 3-5 minutes on each side.
  5. Serve, in a burger bun with a side salad.

Tip:  If you are going to serve your burger with cheese, just before removing the burger from the pan place the cheese on top of your burgers so that it melts slightly.

DSC_0907    DSC_0910 (2)


Bruschetta snacks

DSC_0881

Jones (my housemate) and I have had a tough week and were feeling somewhat jaded this morning.  There was only one way to make us feel better –food.  Unfortunately for us that meant a joyous trip to the supermarket on a Saturday morning before we could tuck in.

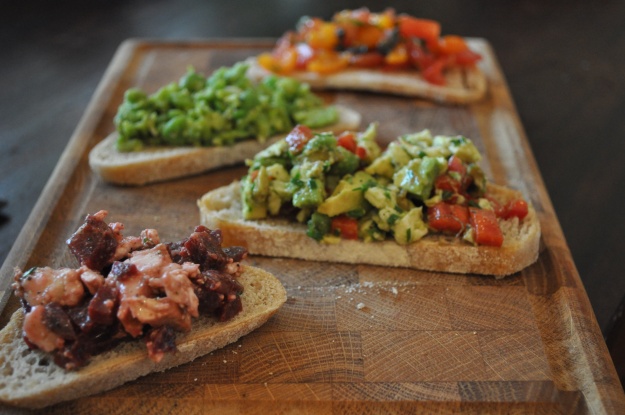
Fancying something a little bit healthy, we settled on the idea of bruschetta, mostly because it can be put together in a matter of minutes and it looks and tastes good!  In the end we made four different types: a classic tomato, a pea and broad bean, goat’s cheese and beetroot and avocado, red pepper and mozzarella.

These bruschetta are perfect for a light lunch, starter or even a canapé.  Don’t be afraid to change the ingredients depending on what you have available and what is in season.  The only thing I would strongly advise is make sure that you season the toppings well and make sure you always taste as you go along.


DSC_0878

Avocado, Red Pepper and Mozzarella Bruschetta

Ingredients:

  • 4 slices of sourdough bread
  • ½ an avocado
  • 1/3 of a red pepper
  • ½ a mozzarella ball
  • 4-5 green olives
  • 1 tbsp of fresh chopped chives
  • Seasoning
  • 1-2 tbsp olive oil
  • 1-2 tbsp balsamic glaze

Steps:

  1. Dice the avocado, red pepper, mozzarella and olives.
  2. Place in a bowl with the chives and stir.
  3. Season well, add balsamic glaze and olive oil (make sure you taste at this point adding more of the balsamic glaze and olive oil as needed).
  4. Toast the sourdough lightly.
  5. Place your mixture on top of the bruschetta.  Drizzle over a little olive oil before serving.

DSC_0876

Classic Tomato Bruschetta

Ingredients:

  • 4 slices of sourdough bread
  • Handful of mixed cherry tomatoes
  • 4 black olives
  • 1tbsp of finely diced chopped red onion
  • 5/6 basil leaves (chopped finely)
  • Seasoning
  • 1-2 tbsp olive oil
  • 1-2 tbsp lemon juice

Steps:

  1.  Finely chop the cherry tomatoes, olives. (If the tomatoes give off a lot of juice then pour away some of the excess)
  2. Place in a bowl along with the red, basil.
  3. Season well , add the lemon juice and olive oil (make sure you taste at this point adding more of the lemon juice and olive oil as needed).
  4. Toast the sourdough lightly.
  5. Place your tomato mixture on top of the bruschetta.  Drizzle over a little olive oil before serving.

DSC_0877

Pea and Broad Bean Bruschetta

Ingredients:

  • 4 slices of sourdough bread
  • 1 handful of broad beans (frozen are fine)
  • 1 handful of peas (frozen are fine)
  • 5/6 mint leaves
  • Seasoning
  • 1-2 tbsp olive oil
  • 1-2 tbsp lemon juice

Steps:

  1. Place your broad beans in a pan and cook according to the instructions.  Once they are cooked peel the broad beans (it is worth the effort.)
  2. In a separate pan cook your peas, once cooked place in a bowl together with the broad beans and mash using the back of a fork.
  3. Season well, add the mint, lemon juice and olive oil (make sure you taste at this point adding more of the lemon juice and olive oil as needed).
  4. Toast the sourdough lightly.
  5. Place your mixture on top of the bruschetta.  Drizzle over a little olive oil before serving.

DSC_0879

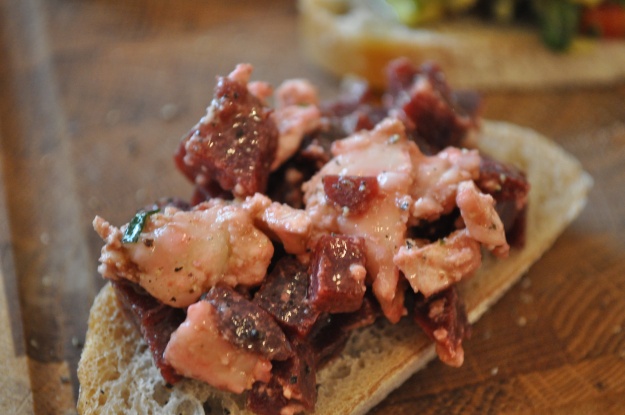
Beetroot and Goat’s Cheese Bruschetta

Ingredients:

  • 2-3 cooked and peeled beetroot
  • 2” goat’s cheese log
  • Seasoning
  • 1-2 tbsp olive oil
  • 1-2 tbsp balsamic glaze

Steps:

  1. Dice the beetroot and goat’s cheese.
  2. Place in a bowl and mix together.
  3. Season well, add balsamic glaze and olive oil (make sure you taste at this point adding more of the balsamic glaze and olive oil as needed).
  4. Toast the sourdough lightly.
  5. Place your mixture on top of the bruschetta.  Drizzle over a little olive oil before serving.


Stuffed chicken breast wrapped in streaky bacon

038

I think time must have started speeding up as I have no idea where the weeks let alone the days nor hours…   I am very much back in London mode, where you try to fit in as much as possible during the day.  Whilst it couldn’t be any more different to SW France, I am glad to be back and I’m thoroughly enjoying being able to catch up with my friends throughout the week and heading off to go sailing or do something a little bit different at the weekends.   (If you are missing my tales of SW France, check out Mumsy’s blog http://molleslifeinswfrance.wordpress.com/author/mollesquercy/ for French life from a less food orientated perspective!)

Between all the madness I have been able to keep playing in the kitchen and have been making a few different things including a fish pie parcel (that I was really pleased with and I hope to share the recipe over the course of the next week) and two gluten free lemon drizzle cakes.  The gluten free cakes have caused me a little bit of dismay, I am used to my cakes being fairly light and delicate and the gluten free cakes were definitely not that!  Truth be told the first attempt at making the cake was definitely the best, I used almonds in the place of the flour and it tasted OK despite the cake itself feeling like a lead weight that crumbled everywhere.  The second attempt was, umm let’s say interesting, it is the first time in years that I have actually followed a recipe for a cake because it suggested using a combination ground almonds and mashed potato.  Yup, you read it right, mashed potato.  In fairness to the mashed potato, I think it did make the texture of the cake more like a sponge, but the taste, well that had a lot to be desired!  However, I shall persevere and try and find a gluten free recipe that both looks and tastes good.

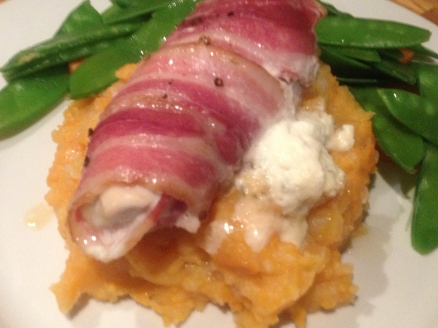
One meal that I have repeated a couple of times over the last couple of weeks has been stuffed chicken breast wrapped in streaky bacon.  The joy with this recipe is that you can prepare it the day before if you think you are going to be short of time and then simply throw it in the oven and cook it as soon as you get home and 40 minutes later you have a delicious meal on the table.  The chicken is stuffed with Boursin Cheese which along with wrapping the chicken in streaky bacon keeps the chicken breast beautifully moist.  The only fiddly bit in making this meal is wrapping the chicken breast in the streaky bacon, but once you’ve found the technique it couldn’t be easier!  This is definitely a recipe worth trying!

043

Stuffed chicken breast wrapped in streaky bacon

Ingredients: (Serves 4)

  • 4 chicken breasts
  • 12-16 slices of streaky bacon (smoked)
  • 1 Boursin cheese
  • olive oil
  • seasoning

Steps:

  1. Preheat the oven to 180C fan.
  2. Remove any sinew from the chicken breasts then, using a sharp knife create a ‘pocket’ in the chicken breast that you are going to stuff the cheese. (I find the easiest way to do this is to work from the ‘fattest’ side of the chicken breast and work carefully inwards, making sure that the cut runs almost the full length of the chicken breast so that you can pack in as much cheese as possible).
  3. Once you have made the ‘pocket cuts’ in the chicken breast, taking a good wedge of the Boursin cheese stuff  the breasts, packing it in firmly, make sure that you press down on the breast to close the ‘pocket’.
  4. Next lay 3-4 slices of the streaky bacon out on top of a chopping board so that they create a rectangle for the chicken breast to be wrapped in.  Place the chicken breast towards one side of the rectangle and then roll up in the bacon, wrapping it as tightly as possible.
  5. Place the chicken breasts on a baking tray, season with black pepper, drizzle over a little olive oil.
  6. Place in the oven and cook for 35-40 minutes.  Serve on a bed of sweet potato mash or couscous with the vegetables of your choice.  Enjoy!

037